Sunday, January 12, 2014

Slowly Working on Celtic Solstice Quilt

I suppose that I should sit down and put together a post so that I can get it on the Linky with Bonnie's Quiltville blog.  I have been slowly working on making blocks for this years mystery quilt, with slowly being the operative word.  I actually did get a couple of blocks made and put together on New Years Day and then things really slowed down.  This is what I had at the the end of New Years.

See what I did there?  Turned the points on the chevrons in and made the block a star.  I did not even think about it until someone brought it to my attention after I posted the picture on Facebook!  I'll be honest, it just seem to want to go together that way.  After observing the discussion on the Facebook page from the other quilters, I have decided to to the quilt with some of the chevron block both ways.  One of the other quilters is making an 9x9 block quilt the same size as mine and is putting a 'star' block at the center and then alternating with the 'correct' block out from there.  Her quilt looks great and so I am borrowing her idea.

So making the quilt bigger means making more blocks.  Back to the cutting table and the sewing machine.  I am finished with the blocks with the blue star points and I am currently working on more of the chevrons.  Here is a pic of what I currently have completed and on the design wall.


I think that the colors are very cheerful!  I do think that I will cut down any more of the really pale green as it looks really washed out in the pictures and sort of breaks the design of the diamond in the block.  I'm still debating about the border color.  I have lots of greens but after having seen some of the quilts with blue borders, I like them too.  I guess that I will need to see more of the design of the total quilt before making that decision.

The process is slow as do not have much time during the week to work on the sewing.  But now that I have most of the components of the larger block complete, even a little work will result in a block or two being put together.

I have enjoyed seeing the other quilter's work in the links with Bonnie's blog.  I really like some of the different color combinations.  Maybe next year I will branch out and try different colors.

Another reason that the quilting thing was slowed down was this handsome guy.  He spent several days at my house at Christmas and of course you don't get much sewing done when you are playing!


I will be looking forward to the Link up next Month so see all of the finished quilts!   Go see all the fantastic work that has been done so far here  http://quiltville.blogspot.com/2014/01/mystery-monday-link-up-part-6.html

Thursday, December 19, 2013

A Little Bit of Everything

I have been doing as Bonnie has suggested, making a few of the pieces from each clue as they appear.  You can see my progress in the picture.  My box is slowly staring to fill up.


I did manage to over cut a few of the white triangles for the first clue, but never fear, I have set them aside for another day.  I may even use them to piece blocks to use for the for the back of the quilt.  Clue one is finished and I have been working steadily on the other 2 clues when I have time.

The clips that you see in the picture are the new larger clips by Clover.  They are working very nicely to hold the counted blocks together so I know how many I have completed.  Now if I could just figure out a way not to make the counting mistakes when cutting fabric.  lol

Looking forward to the next Clue out tomorrow.  Please take a look at the progress of all of the other folks who have linked to Bonnie Hunter's Celtic Solstice quilt page - http://quiltville.blogspot.com/2013/12/celtic-solstice-mystery-monday-link-up_4572.html.  Have a great weekend, everyone!

Sunday, December 8, 2013

No Waste (Triangles)

I was finally able to get all of the white on white scraps together and to find some yellow and golds for this clue as well.  I have decided to go with the white background as I had lots of scraps from previous projects and decided that this would be a good time to use them.  The print backgrounds are nice, but after 2 mysteries with rather busy backgrounds, I thought it might be time to tame it down a little bit.

I also thought that folks might like to see how I made the chevrons with out any waste triangle.  How can that be?  Well, some fancy footwork with the easy angle ruler and a template will get you this block with out the waste of the sew and flip.  I had used this once before when working on rectangles that needed a sew and flip triangle end and I was running short of fabric and thought that there must be a better way.  Who would have ever thought that the geometry that I took in high school and college might come in handy?

So here we go - how to do this without waste.

First cut a piece of paper to the 2 inch with that your fabric strips will be.  I used a piece of used printer paper.  Measure your 3 1/2 inch length that Bonnie would have you cut your green fabric somewhere in the middle of the length of the paper.


Next measure 2 inches toward the center of the 3 1/2 inch piece as shown.  This will show you where the corner of the 2 inch white or yellow square would be on the larger piece of fabric if you were doing the sew and flip corners.


Next you will draw a line from the corner to the 2 inch mark that you just made.  I made a dashed line to represent the sewing line that you would be sewing from corner to corner of the square white or yellow piece if you were sewing.  It is marked in the picture below.


Now take a ruler and add your 1/4 inch seam allowance to the sewing line that you just drew.  This shape, a parallelogram, is the shape that you will need to cut from your green strips.


Adding my seam allowances


Cut out the parallelogram on the edges where the fabric will be cut.  Sewing line is marked as noted previously.


Now you will take that shape and using your easy angle or other ruler used to cut half square triangles (you see that I use a Omnigrid product) you will place the template (paper shape) on the ruler that you can use to cut your fabric.


The tip of the template should be at the one of the 'straight' edges of the triangle and the seam edge will lie along the angled edge of the ruler.  Make sure that this is the way you place the template on the ruler.  Your marked 'sewing line' should be parallel to the angled edge of the ruler.

As you can see the 'top' edge of the template lies just on the 1 1/2 inch line, which by the way, is also the line that is used when I cut triangles from a 2 inch strip.  Line up the cut edge with the angled edge of the ruler as shown and tape the template to the top of the ruler.  You are now ready to begin cutting your fabric.

Cutting

Take 2 strips of each of the green, white and yellow colors and place each color together either right side together or wrong sides together.  I do whatever, as you can see from the pictures.


I then put my two white and two yellow strips together so I could cut all four at the same time.  I don't usually do more that 4 strips at a time to keep things from sliding when I cut.  Cut some half square triangles.  These at for the 'tips' of the half-chevrons.


You can see in the picture how the ruler sits on the fabric for cutting the triangles and how that relates to your template.

No you will cut some green parallelograms.  After straightening the end of the strip, cut a half square triangle.  This will make the angled edge you need to start cutting with the template.  I do this and save the triangles for a future project.  The pieces that you see in the little drawer are all from the Lazy Sunday mystery.


Using the template you constructed, you can now begin cutting the green parallelograms as shown.  The 'back' edge of the template goes along the angled cut edge of the fabric and the top and bottom of the template along the edges of the cut strip. 


Here are some cut pieces.  

Remember that you cut the fabric right sides together and now when you take the pieces apart, you have the uphill and downhill parts of the chevron as shown.


I have no idea why that template looks so much bigger that the fabric pieces but believe me they are the same size.

Take your yellow and white half square triangle and arrange then as shown to begin sewing the chevrons.


The left side of the pictures shows how the triangles will lay on the parallelogram for sewing.  Sew one triangle to the green fabric, fold that triangle back and sew the opposite triangle on.  Keep track of your colors, you should have one white and one yellow for each green parallelogram.

One triangle is on.

Both triangles on.

Now press the pieces, remembering to orient the seams so they will nest.  I found that pressing the seams in the directions shown result in pieces that 'nest' nicely and have the seam on the piece of the block that comes in contact with the bed of the sewing machine pointing away from the needle for easier sewing.


Sewing to block together as shown results in fewer dog ears to trim as shown below. 

Right way


Wrong way,  more 'ears' to trim

You can now begin putting the pieces of the chevron together in order to get this....


Now with a few 'friends'.


Hope that you enjoyed the tutorial.  Making your chevrons using this method results in only 'dog ears' to throw away or deal with.

I am going to work on finishing my Lazy Sunday quilt tonight.  I only have one border to put on and I am determined to get it finished and out of the way!  I am looking forward to seeing everyone's progress on Celtic Solstice on the Monday Link-up!

WOOHOO!!! The border is done and on!  I decided to make the quilt larger and so it is square and queen sized.  This is the completed quilt laid out on my full sized guest bed.  Now I need to get the backing done so this can go to my quilter.  Time to straighten the sewing room and really get into the new mystery.


Thursday, December 5, 2013

Mystery Time Again

Time to re-activate the blog for the Bonnie Hunter 2013 Mystery, Celtic Solstice.  I did manage to get last years mystery done and was able to have it in the guild quilt show this spring.  Still finishing up the Quiltmaker's Mystery.

I still have one more border to put on that quilt, but needed something to show for the Monday link-up.  Here is a picture of the two block that I have done.  Ended up cutting eight block to make but decided to make just 2 to use the rulers and check out my seam width.  Everything appears to be working well.  I am enjoying everyone's pictures and blog posts!

Now ready to go for tomorrow's clue.


The rulers make cutting the pieces easy and accurate and with a correct size seam the block turn out a perfect 3 1/2 inch size.

Check out all the links  http://quiltville.blogspot.com/2013/12/celtic-solstice-mystery-monday-link-up-1.html

Sunday, January 13, 2013

Slowly Finishing Easy Street

Easy Street is starting to come together!  Of course, I always have to look for the longest and the hardest way to get to the end, and this time is no different.  I got behind on the clues and so I have been making my quilt block by block instead making all of the blocks and putting them together.  Doing this has shown me several things about the construction of the block that may be of help to the folks who were waiting to make the quilt later or have not finished yet.

Construction tips for Easy Street.
1.  For the obsessive among us (yes, me too.) the seams will nest better if you make a few of the gray and white foursies twist the other way.  You will need 4 of the reverse twist four patch blocks for each B block and 2 for each setting triangle.  It will be obvious where they are to go when you lay out the block.  I had kept a few of the four patches back to use as leaders and enders so I was able to make a few of the blocks with the reverse twist.

2.  When pressing and during construction, press toward the green.  This will allow the seams to nest better and will give you crisper corners.  I used Bonnie's color scheme, so if you have changed the colors just substitute your colors.   Be aware that you may have to un-twist some of the four patches and make the seam lay all the same way in order to get the proper fit.

3.  I pressed the seams on the A blocks up and the B blocks down and they fit together nicely.

4.  Watch the direction of the four patch blocks closely!  I think that I wasted more thread un-sewing than I saved by chain piecing.  :-(     Oh well, that is part of the process.

The quilt went traveling as well.  I had a week off and spent part of it with my son, daughter-in-law, grandson and daughter during the first part of the week and the last part of the week with my other daughter.  And I did get some sewing done!

Here are some pictures of the still not completely completed quilt top.  I still have not picked out a border fabric, but I have the backing ready to prepare.  I picked it up on sale and it is the apple green color!

I just want to thank Bonnie for all of the fun with the mystery and tell everyone how much fun it has been seeing every one's progress on their quilts.  There are a lot of very talented people out there in the blogosphere  that quilt!  Keep up the good work!


One corner is done! (natural light)


More of the quilt is done. ( Incandescent light)


It is hard to get much sewing done when there is a baby to play with!
  It's a tough job, but Grandma's got to do it, right?

Thursday, December 20, 2012

Waiting until the last minute!

Decided that I had better get something on the blog or it would be too late to make the link for this week.  I did not get much done on Clue 4 of Easy Street, as I had many other thing to do this week.  Last minute sewing for Christmas and such as that.

I did get a few of the purple and turquoise geese made and a few of the 3 1/2 inch green blocks cut for demonstration purposes.


No idea where I got the green with the little lavender sprig print, but I think that it will help to tie the colors together.

Another reason that I didn't get much sewing on the mystery is this little quilt.  When I finished with clue 3, I was in a sewing mood and pulled something off the the shelf to complete.  I was determined that I would finish this project that I picked up on a shop hop in 2005!


I miss-cut several times, it was a good thing that there was extra fabric in the kit.  This should make a cute table topper as it is only about 38 inches square.  Anyway off to get this in with all of the posts in Bonnie's link for Clue 4 of Easy Street mystery!

Sunday, December 9, 2012

Bury the Lede

Well, the weekend was rather productive, but the week was pretty much a total loss.  Didn't get much done as I had a horrible cough and laryngitis that lasted all week.  It took a day and one-half of resting my voice on Saturday and today to get back to something that sounds like normal.

I didn't get all of the part 2 geese done for Easy Street before the 3rd clue came out on Friday.  So I did have some catch-up to do.  Luckily, Bonnie had a couple of sessions of Quilt Cam this weekend, so I had time to get caught up.  I finished up the purple geese and then started on the new blocks so now, I'm all caught up with the clues.  Am waiting to cut the green squares until I know how they will be used.  Then I can chose the 'right' green.

I ended up not using a couple of the aqua blue/turquoise fabrics that I had chosen because they looked to light.  My colors for this group are very saturated and the lighter ones would just have washed out too much.  Anyway, here at the Part 3 blocks of Easy Street in all their glory!


I was playing around with the blocks and the rectangles that we had cut previously, anyway these are laid out on the 'outback' part of my Koala Outback Jr. sewing table.  The green thing at the top of the picture is the box that the mystery pieces live in until they become a quilt.  Here they are all arranged in their separate compartments.


The notebook has the clues for this year and from last year's quilt, Orca Bay.  Now comes the buried part.  I said that I was finishing that quilt in last weeks linked post and did get it done to take to my guild meeting on Thursday.  I am a member of the Lake Area Quilters Guild.  I would like to thank the ladies who helped me get the picture of my quilt!  I didn't have anyplace to hang it for photos.


You don't really get the full effect of the amount of movement in this quilt until you get a chance to step back and take a look at it.  I really like the red and blue.  I decided to add the black border to make it a little bigger to fit the bed that will be graced with this quilt.  Penny Barnes of The Quilted Forest did the machine quilting for me, using a variegated thread.  This is a freehand design.  The red and blue print that you see is the fabric on the back of the quilt.


I was quite pleased with the finished product and if Easy Street is as good (and I am sure that it will be) I will be a happy camper.  

We did get a little snow today, none of which stuck around very long.  It did look quite impressive for a while. This is the tree in the yard across the street from my front door, taken this afternoon.


Happily, it did not snow like this for very long!  

Looking forward to seeing all of the progress on the Link-up on Monday!  It is so much fun to see what everyone is doing!

Happy quilting!

Monday, December 3, 2012

Purple, Purple. Where is the Purple?

I was up early to see about the clue for Easy Street.  Picked up the iPad from the nightstand and looked up the new clue!  I tried to print is out before I realized that I had unplugged the wireless printer when I was decorating for Christmas.  Hop out of bed to plug in the printer and get that clue on paper!  Unfortunately, then I had to get ready to go to work.  I turned out to be an interesting day, as I had lost most of my voice.  I did manage to croak my way through the day with a minimum of times repeating myself because people could not understand what I was saying.

I had not gone looking for the purple after the initial information about the colors in the quilt.  I thought that I would have enough, as I had some left from a project from several years ago.  One of my son's friends was getting married and wanted a quilt with black, tan and a little purple!  My first thought was - what a color combo.  I usually make scrappy quilts for gifts, so off I go to get the colors.  I had blacks left over from that project, but could not find them for last year's Orca Bay.  Well, found them this year!  A day late and a dollar short, as always.  I was determined that I was going to find those purples this year! And I did!

Here is a picture of the original project.  This is a smaller copy of the queen sized quilt that I made from blocks that I put away so well, I could not find them for the queen quilt. (Am I sensing a theme here???)


The pattern is Rocky Road to Dublin and I think that it looks quite nice, even if I had a few thoughts about the combination of colors!

Off to look for the purples!  I finally found the strips that I knew that I had in the 3 inch bin.  It hurt just a little to lose that inch, but I can use it in some string piecing someday.

Here at the strips, both 2 inch and 3 inch.  I think purple give such a rich look to any quilt.


I did get about 20 of the flying geese done and quite a few more cut out, but I did not have much time for sewing this weekend as I went to see my daughter for her birthday and also to see this little guy


I think that he is a good excuse for not having all my flying geese done!  What do you think?

Here are the geese that are done and the ones that are cut and ready to go!  Hope I will get a chance to sew a little here and there this week and get them finished up.  If not, then they wait for another day!


I have really enjoyed reading all of the blog posts from all over the world!  Last week I was in the first 50 and this week I didn't make the first 150, oh well.  Better 'late' than never.  I hope to have my Orca Bay quilt finished for the Monday Link-up next week.

Happy sewing, everyone!

Sunday, November 25, 2012

Decorating for Christmas

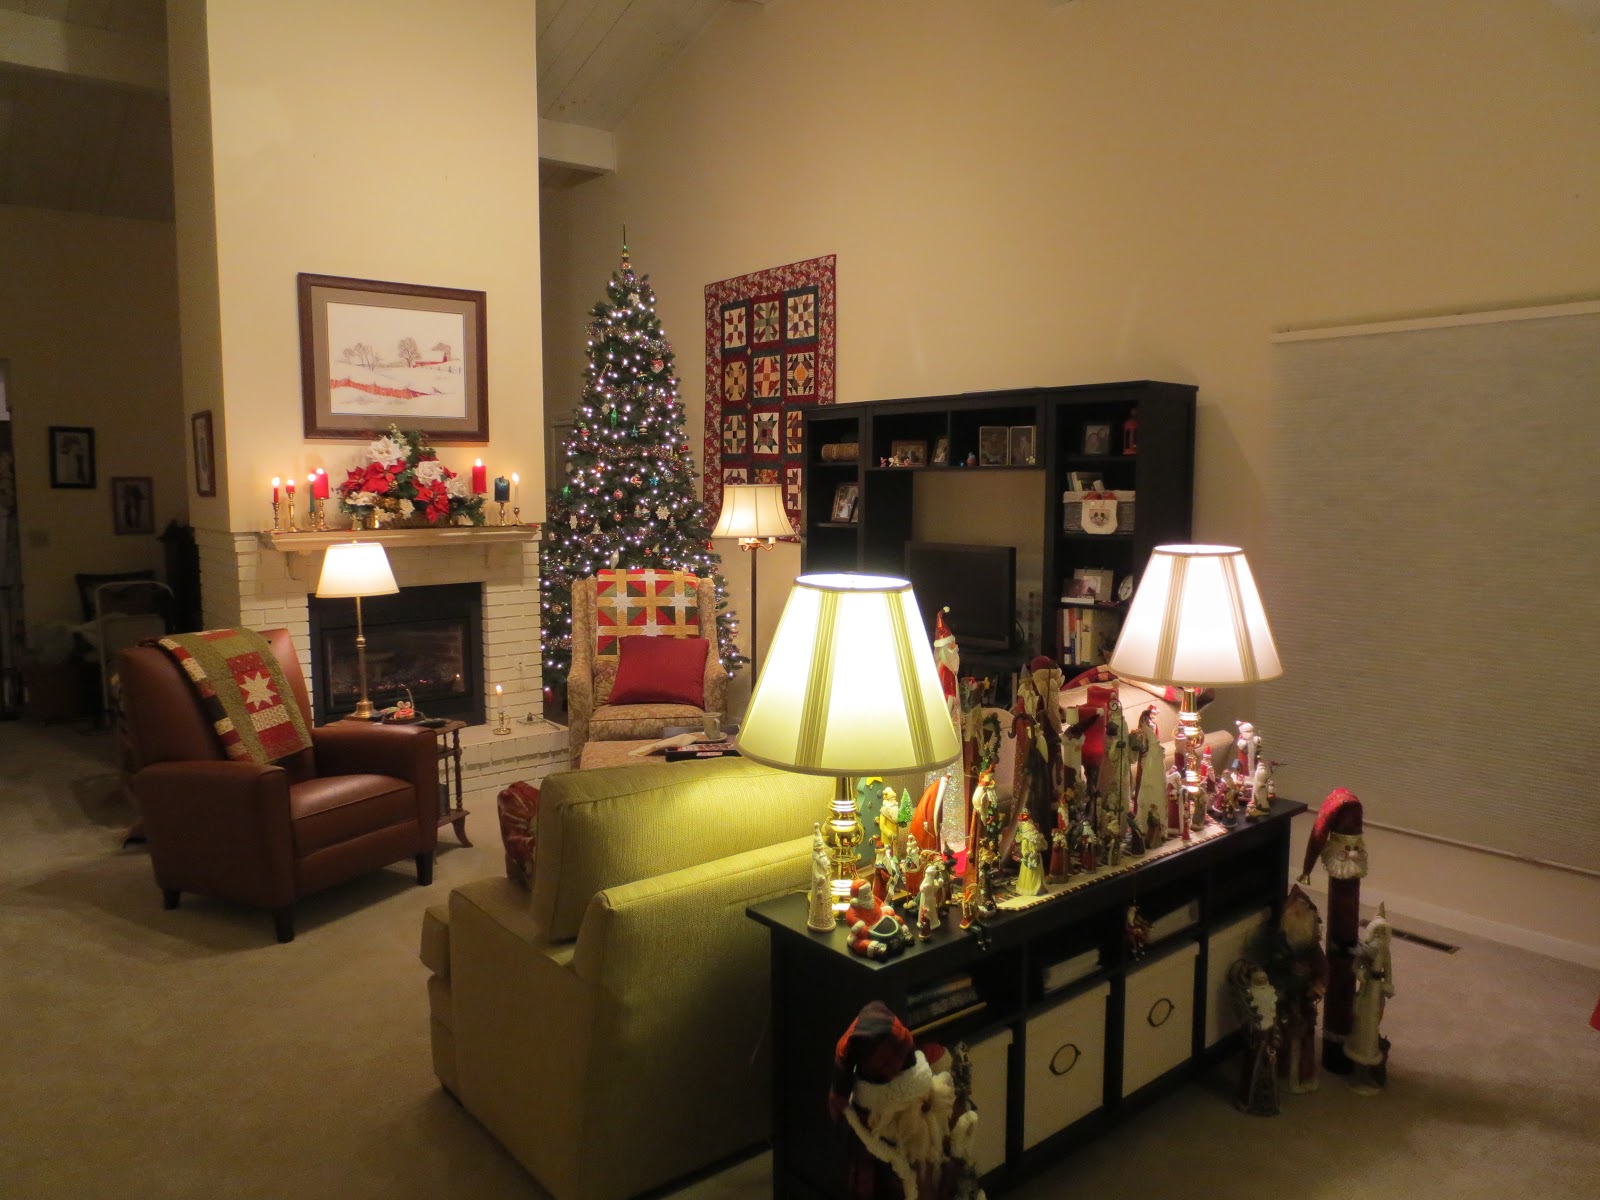
Decorating for Christmas took on a whole new twist this year, with the redecorating of the living room/dining room over the past year.  Started with new windows (boy, have they made a difference in the heating bill) followed by a new gas fireplace insert.  Then new carpeting, out with the 20 year old stuff!  New furniture was next.  Still need to get some sort of window treatments, haven't seen anything that just hits me right.  Also, still waiting for the entertainment center.  The one in the picture is a temporary one from IKEA.  It is nice, but not quite big enough for the record player that I have and want to use.  Anyway, it does look nice and the new one will be very similar in color and style.

So, can't put the tree where it used to be, no room there.  Couch is in the way.  Can't put the Santa collection by the fireplace, too hot now with the new insert.  The tree is 9 feet tall, so the only place that it will fit now is between the fireplace and the wall and the Santa's will go on the sofa table.

The santas are a story in themselves.  When I was in my residency in Nebraska, I purchased the first one of my tall Santa collection at our church bazaar.  It was followed closely by a second tall Santa that I received as a thank you gift.  I took that as a sign, need to collect tall Santas.  I have added a new one every year, sometimes more than one, but I have to slow down now as I have a bunch.  I am looking for ones that have interesting details or are a unique color.

Anyway, here is the finished product for the living room.  Pictures of the dining area to follow as soon as it is finished!


As you can see, there is not much room for any more Santas.  That is of course, unless they are small.  A couple of short Santas made it into the collection, but they were gifts.


The quilt on the wall is actually my daughter's, but it's here and she's not so I'm using it because it has a hanging sleeve.  I do have another one that I can put there when she decides that she want this one back!

All in all, the room looks rather festive, I think.  I hope to spend some evening time enjoying it!  Merry Christmas and Happy Holidays!


Saturday, November 24, 2012

Quiltville Mystery Time Again!

Well, another year has swept past and it is time again for Bonnie Hunter's annual mystery.  She is calling this year's quilt Easy Street.  Bonnie's initial information about the color of the fabrics and the amount that you need is in this post.  The first clue came out on Black Friday, so as soon as I was up, I printed it out.  I have a new printer that does a very nice job of doing two sided printing and so I will be using that and cutting down on the amount of paper this year!

I did need to make a shopping run to the local quilt shop, The Quilted Forest.  The shop was featured in the Better Homes and Gardens Patchwork and Quilting Quilt Sampler this fall!!  I had used up most all of my black on white prints in the Orca Bay quilt that was the mystery last year.  Oddly enough, although I didn't think that I would find much apple green called for in the pattern, I did find quite a pile from my scraps and from fat quarters.  Who'd a thunk it, I don't recall making much of anything with that color but seemed to be collecting it.

Back to the sewing room to work on the four patches called for in the first clue.  The picture shows the four patches grouped into four groups.  I had a very few patches of some of the black and white prints and in order to keep them from all showing up in the same place in the quilt, I split them up.  Now there will be a few patches of the 'rare' prints in each quadrant of the quilt.


I saved about 16 of the squares back to use as leaders and enders for the rest of the clues.  The stacks of blocks are held together with a long pin with a small piece of eraser on the point of the pin.  Quick and easy way to hold them all together!

I have been looking at other blogs and it looks like a lot of people are changing the colors this year.  I decided to stay with the original color suggestions, mainly because it a little outside the box for me.  Thought that I would stick with the 'retro' color scheme (that's what my daughter called it) and run with it.

 After getting all the four patches together, I had some time left, so decided to work on a couple of Christmas presents.


My daughter has a 1950's bungalow and I thought that these would look great in her kitchen.  If you are reading this dear, try to act surprised when you open the box on Christmas!  That yellow is a real eye popper.

I am looking forward to the Monday link-up to see what everyone is doing with their quilts.  Happy sewing, everyone!

Monday, October 1, 2012

School kits for Lutheran World Relief

I have been making school bags for Lutheran World Relief for several years.  The church I attend and am a member of, Immanuel Lutheran, participates in this worthwhile endeavor.  The ladies of the church also do quilts and furnish other kits, such as sewing kits and hygiene kits, but I like doing the school kits.  I think that part of the fun is thinking about the children who will receive the kits and imagining them using them at school.  My mother always says that no one can take away what you learn.  To find out more about Lutheran World Relief and the work that they do, click on the link.

The best time to buy supplies for the school kits is obviously in the fall when school supplies are on sale.  The items that are included in the kits are easy to find, but the cost can start to add up if you don't get things on sale.  LWR changed from a bag with handles to a drawstring backpack type of bag for the kits.  In my opinion, it is faster to make than the old bag with handles.  LWR does give instructions for making the school bags, but the purpose of this blog post is to show you a way to make them from 60 inch upholstery fabric with virtually no waste.

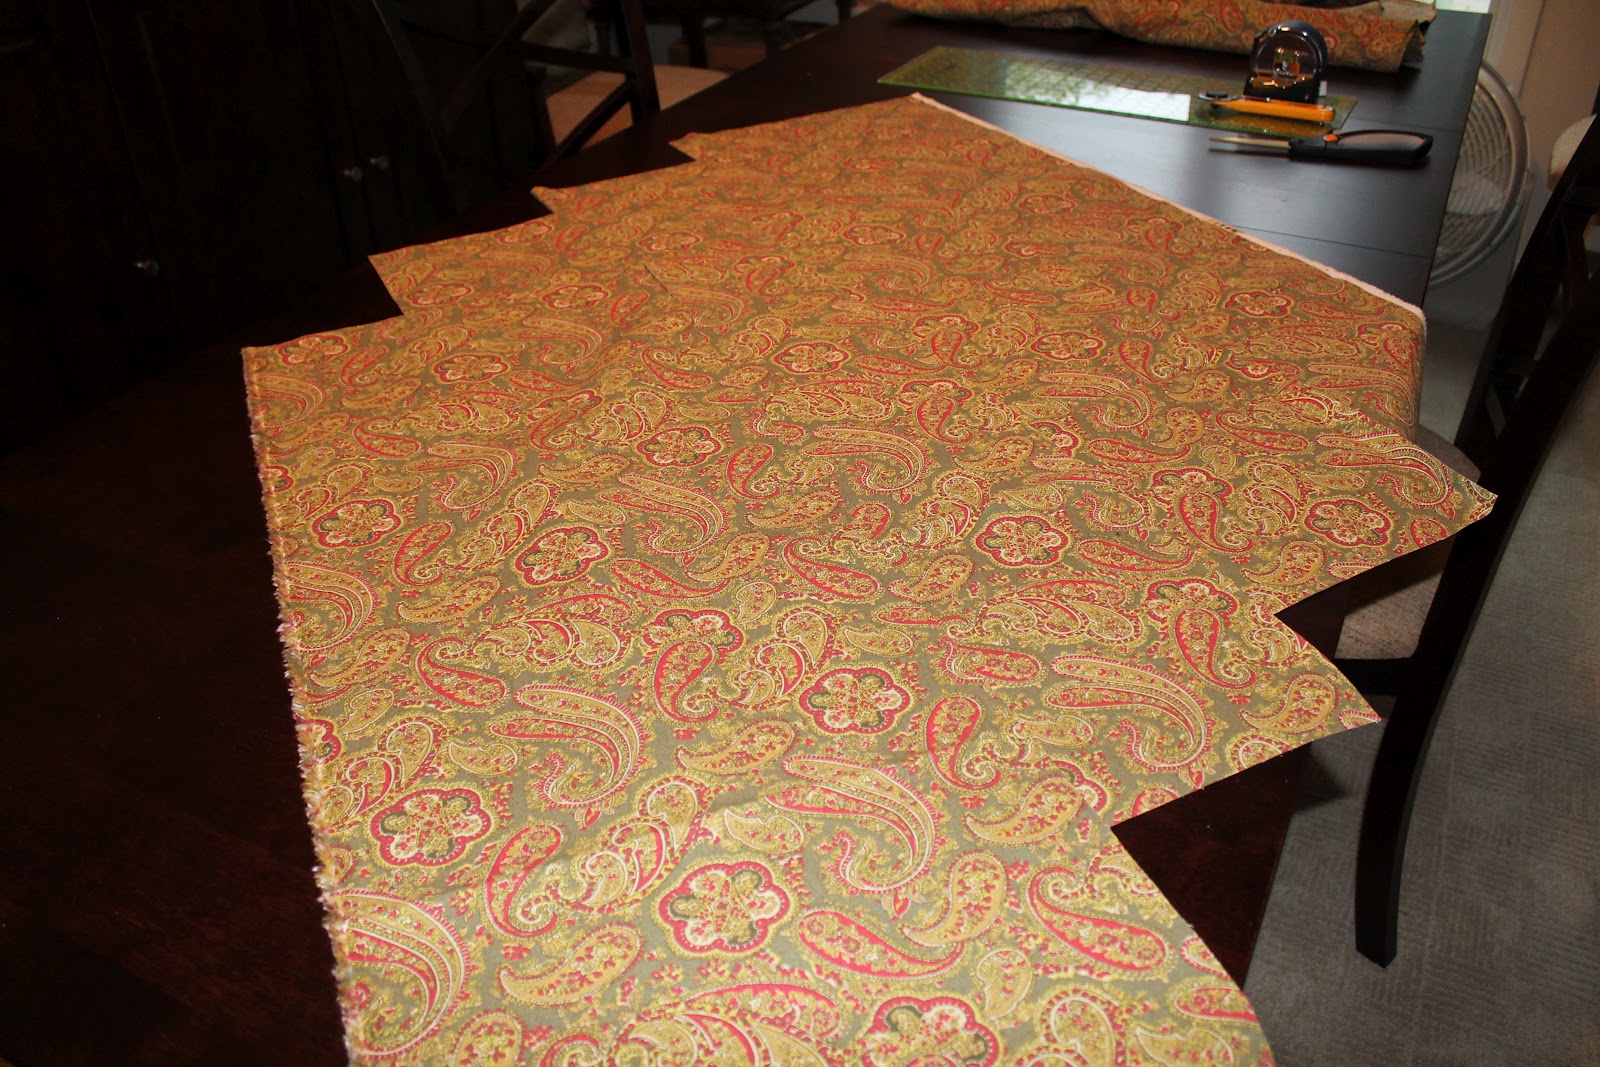
I like using 60 inch wide fabric as you can get four bags out of about 1 1/4 yards of fabric.  If you watch for sales, you can sometimes get your material for $3 a yard or less.  Some of prints may not be something that you would use for your furniture, but make great school bags.  You can find 60 inch wide denim was well.  Make sure that the selvages of your fabric are aligned before cutting.  You can see that the fabric I have chosen, when folded in half, selvages matching, is about 29 inches.


Cut the fabric the straighten the edge.  Then measure and cut a piece of the fabric to your length of 38 inches.  

I'm using a metal tape measure to get the length correct.  I didn't have any other measuring device that was as long as I needed.  I used a rotary cutter  to cut the fabric, you could mark the fabric and use a scissors as well.
I then cut the fabric into 2 pieces that are 1/2 the width of the fabric and the length of 38 inches.  For the fabric that I was using I just cut down the fold as shown.


Next I took the two pieces of fabric and folded them so that the 2 short edges were together.  I did this to make it easier to cut using the rotary cutter.  I measured the fabric that I could cut two pieces of the same width and cut it, resulting in four pieces of fabric 38 inches long and about 15 inches wide.


Here are the four pieces of  fabric that will comprise the body of the bags.


Constructing the Tabs


You will need to cut a piece of fabric 4 inches wide and the width of the fabric to use for the tabs at the bottom of the bags.  You will thread the drawstring through the tabs to create the drawstring straps.


In the next picture you can see that I have folded the 4 inch strip so that it is now 2 inches and have pressed it to make a crease.  I don't usually do this, but did so today to show how it looks to find the center of the 4 inch strip.


Fold the edges of the fabric toward the center (crease seen in previous picture) and then fold the fabric strip in half along the crease (center) to create a 1 inch wide strip of fabric.  You will have 4 layers of fabric.


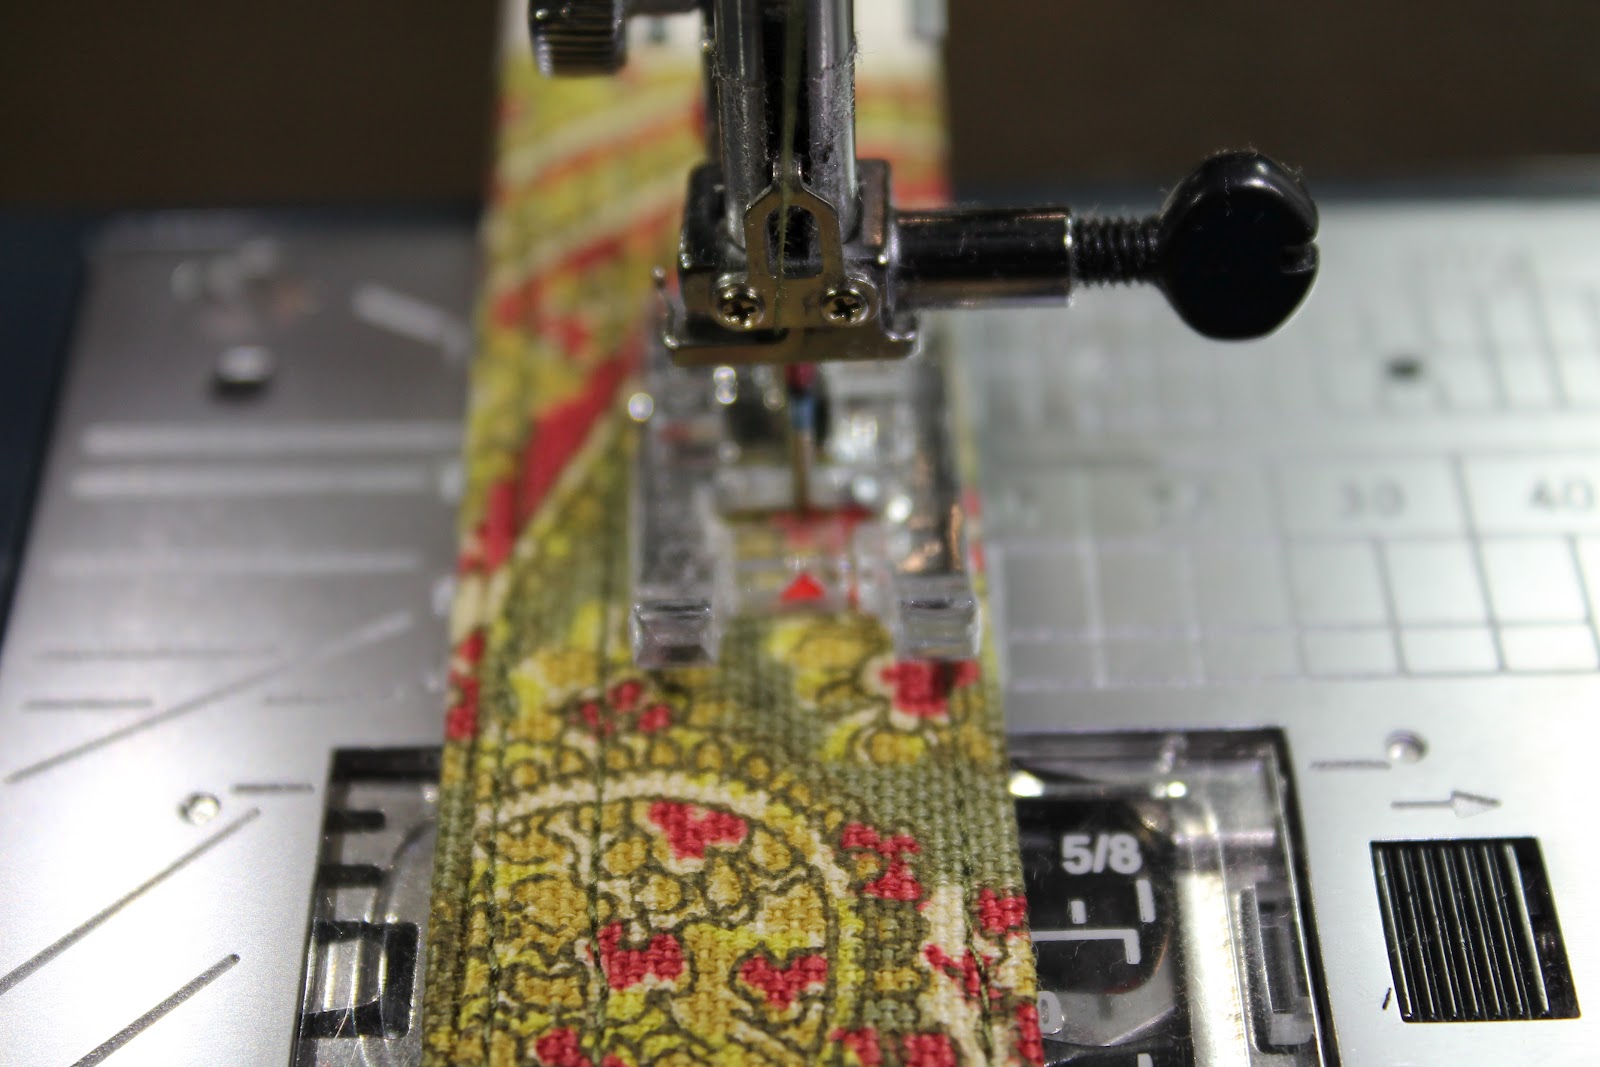
Sew very close to the edge of the fabric opposite the crease.  I usually try to sew about 1/8 inch in from the edge.  Sew the entire length of your strip.  Now sew close the the crease edge of the strip, again the entire length of the strip.  I then sew both the edges again, about 1/4 inch from the first line of stitching.


                       Down one edge.


       And up the other edge!


Now the stitching at 1/4 inch from the previous stitching.
Set this strip aside for use later in the construction of the school bag.

If you would rather skip the step making the tabs, you could use 1 inch wide nylon webbing instead.  It would be a way to save some time in the construction of the bags.

Construction of the School Bag

The directions published by Lutheran World Relief tell you to make a 1/2 fold around all the edges of the fabric for the body of the bag and sew around the edges.  I have a way that I think is easier and doesn't require so much sewing that is not really used to put the bag together.

On each of the long edges (38 inch) of the bag fabric, turn about 1/2 inch of the fabric toward the wrong side as shown.  The edge shown in selvedge, but most of the edges that you will be working with will be raw edges.  Sew close to the folded edge of the fabric.

 I do a lot of quilting and one of the things I do is chain piecing.  This means that I sew quilt pieces together without cutting the pieces apart every time I sew two pieces together.  This cuts down on wasted thread, which is something to think about with the cost of supplies today.  You can see how I go from one piece to the next without cutting thread.  You can cut the pieces apart later.


I do a second like of stitching about 1/4 inch away from the first line of stitching for the 4 inches of the folded side edges of the bag on all 4 corners.  This reinforces the edge for the casing.  This step could be left off if you desire.


 Now turn down two inches on each of the short edged of the bag.  This will form the casing for the drawstring.  

The stitching forms the top of the casing for the drawstring.  Next turn up 1/2 inch on the edge of the casing as shown and sew, again along the edge of the fold.  Your casing is complete.  I usually do a second line of stitching to reinforce the bottom of the casing.

For everyone who is wondering about the blue tape that you are seeing on my sewing table, it marks the center of stitch plate on the machine and I use it for centering long pieces of fabric when sewing.


Your bag should look like this.


In preparation for completing the side seams, cut the tabs to hold the drawstrings at the bottom of the bag.  Retrieve the long strip previously prepared for the tabs.  I cut my tabs at 4 inches in length.  If you only have one strip of tabs for 4 bags, you will need to cut them a little shorter than 4 inches in order to have 8 tabs to complete the project.

The cut tabs then need to be folded in half as shown, except that the edges will match.  You can see what the tab will look like when pinned into the bag in the background of the picture.


Take your bag and matching the top of the casing, fold the bag in half, wrong sides together.  As shown, add the tabs to the bottom of the bag, taking care to make sure that they are completely enclosed inside the bag.  Double check here, it is very easy to get one piece of the tab sandwiched in the bag and have one piece sticking out on the back of the bag.  Being careful now will save a lot of frustration and un-sewing later.  Trust me, I know!


Your bag should look like this now.

Making sure that the side edges are properly aligned, beginning at the bottom edge of the casing, sew the sides together close to the stitching that you originally did when you turned in the sides 1/2 inch.  Check often to make sure the edges remain properly aligned and that you are stitching through all layers.  Backstitch at the beginning of the seam and when you reach the tab, to strengthen these areas, as they will be under a lot of stress when the bag is used.


Do not start your stitching at the very top edge of the bag or you will sew the casing shut!

I add a second line of stitching about 1/4 inch in from the first line of stitching, again for reinforcement.


Make sure to add extra stitching at the bottom edge of the casing.


I just did some straight sewing, you could make a X or something more decorative if you wished.  Trim all of the threads.  Sew both sides of the bag in the same manner.  Your bag is now finished except for the strings.


You can see the casings of the bag and how the stitching does not go all the way to the very top of the bag.


I thought for a long time about a quick way to put the strings in the casings.  I wanted a way that was quick and easy.  Using a bodkin of some type to pull the string through the casing would have worked, but was too time consuming,  Here is my solution.  It is quick, easy and most of all cheap to make and use.


I cut a small dowel to a length that was slightly longer that the width of the bags that I needed to complete.  Then I used some painter's blue tape and wound a 12 inch piece around one end of the dowel.  I can tear off the tape as it loses it 'stick' and have new piece ready to go.

Cut your drawstring to 2 yards in length, you need 2 per bag. Seal the ends of the cording if using nylon or polyester cord.


Wrap the tape around the dowel and cording as shown in the following photo.  You will then push the dowel and the attached cording through one side of the casing and back through the other as shown in the following pictures.


Now, put one end of the cord through the tab on the same side as the cording and tie using an overhand knot, as shown above.

Your school bag should now look like this


Add the second drawstring in the same manner, starting on the side opposite of the one that already has a string.  This completes your drawstring school bag.


Finished!!

You can now fill with the supplies listed on the information from Lutheran World Relief!


In order to keep the supplies in the bag and make it easier to handle for shipping, I fold the drawstrings toward the center of the bag and then fold the top of the bag down and tie the resulting package with twine or string.  Nice, neat and nothing can spill out.


I hope that you have found the preceding information helpful.  I usually make 2 or 4 bags at a time using the chain piecing methods described.  If the fabric is precut, I can make 4 bags in about 45 minutes of steady sewing.  

Happy Sewing!!